If your refrigerator is too warm, freezer won’t defrost or too cold then you may need to replace the defrost timer (part# WR9X489). The first step is to disconnect the power to prevent electrical shock. Open the refrigerator door and remove the knob from the cold control. Pull down on the light cover, hinge it upwards and lift it out the way. Remove the light bulb and set it aside. Next remove the single quarter inch hex screw in the center of the air diffuser on the control housing. Rotate the housing outward and set aside. Remove one more quarter inch hex screw from the top of the controller housing. Once you remove that screw, tilt it forward and lift it away from the back panel. Disconnect the wire harness by depressing two locking tabs on the side.
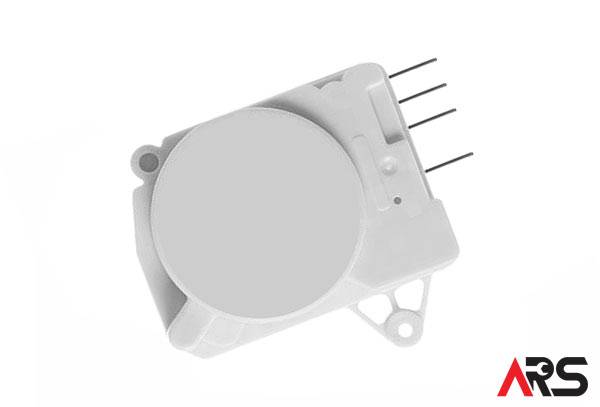
Now that you have the control housing out of the refrigerator, remove two quarter inch screws that hold the timer to the housing. Flip it over and remove the timer out of the housing. There is a 4-pin connector that attaches to the defrost timer. Use a flat blade screw driver to pry between the connector and timer. Discard the old timer. Plug the new timer into the harness. Position the new timer into the housing and replace the two quarter inch screws. The defrost timer has a dial that will only turn in a clockwise direction. Using a flat blade screwdriver, turn it until you hear a loud click. The click indicates the beginning of the defrost cycle. Turn it a bit further to take it out of the defrost cycle so the refrigerator will cool.
Now you’re ready to reinstall the housing. Reconnect the wire harness. Attach the control housing and reinstall the screw. Reattach the air diffuser and the screw. Reinstall the light bulb. Reattach the light cover and knob. Now you are ready to reconnect the power. Your repair is complete.